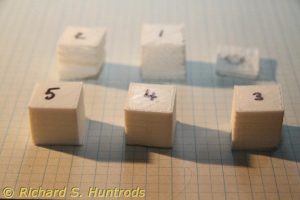
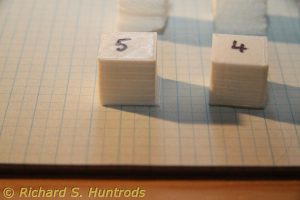
I’ve been working with the FLSUN delta printer I built from a kit this week, and although it has printed a few of the test cubes, it’s still not quite fully functional yet.
It turns out delta printers are a lot faster than cartesian (x,y,z) printers, but with that speed comes some rather unique challenges. The first is that the printer, being tripod and pendulum based, really wants to print in an arc. To counter this, the software needs to know a lot of details about the printer, such as segment lengths and arcs in order to calculate various angles and offsets to use when printing.
Fortunately the delta code firmware I’m using (Marlin 1.1) now has an auto calibrate feature that works with the built-in z-probe on the FLSUN delta. Not all deltas have the z-probe, but it’s easy enough to add to any printer. Basically it’s a microswitch down near the extruder that detects when the extruder is near the print bed. On the FLSUN, the switch is triggered by a rather ingenious lever mechanism built into the extruder mount. When the tip touches the bed, it rocks slightly and trips the microswitch. You can fine tune the triggering pressure so that it’s very accurate. There is one compensating measurement you must take, and that’s how much deflection occurs when triggering. That is, the extruder doesn’t just touch the bed, it touches it a bit MORE than when printing to tip and trigger the switch. You need to know (in mm) how much this extra movement is so the software can compensate when calculating actual bed height.
The auto calibrate touches the bed in a set number of places that can be programmed (n*n, with n=4 as default). It can then calculate various angles and offsets that you then either save in the printer firmware eeprom or hand code into the software. I chose to hand code. The default calibration runs until a set standard deviation is achieved, so it’s quite accurate.
Once the auto calibrate is done and the information encoded in the firmware and uploaded to the printer, you can print.
My first prints were terrible. I quickly realized the extruder calibration was off. Extruder calibration is done with auto calibrate but must be done separately. Mine was barely moving, so after some experiments and adjustments, I got the correct parameter (stepper steps per mm of filament) and that was OK.
However, the next several prints were all still bad. I quickly found one of the three end stops that controls the position of the extruder was loose. After adjusting and tightening, things were much better, but there’s still a problem with the print.
The first few layers (about 1mm or so) are offset from the rest of the print in one direction. It’s consistent and repeatable at this time. The rest of the cube is perfectly straight, so it’s a “first layer” problem. So far I have not found any solution on the internet.
One hint that I’ll be pursuing is that the height measurement of the cube is only 19mm, while the sides are both 20mm perfectly. That implies again a “first layer” problem, possibly too hot. I am also considering the fact that this printer is incredibly fast. It’s almost twice the print speed of my first (cartesian) printer. It’s possible that it is simply printing the first few layers too fast, which may also affect the temperature of those first layers.
My next steps are to compare speed parameters between Marlin 1.1 (my current firmware version) and Marlin 1.0 (supplied with the printer) and my cartesian printer (also Marlin 1.1, but much slower settings). I will also try slowing the first layer in slic3r as a quick test. If slowing the initial print speed works, then that will be great. For now it’s a wonderful printer that has yet to realize all it’s benefits (and yet to make it’s first perfect print).

