Network Update for Nov

While fretting about the ever increasing connectivity bill, I discovered that I could get faster internet for about $8 more per month from Telus, my current provider.

We don’t have fiber in our area, so all I can get is an upgrade from 25mb/s to 75mb/s download speed. Still, for $8 that’s a no-brainer. I called and an installation was arranged.

In order to get this speed, the modem needs a bonded pair of wires, so a second jack was added and the new modem connected.

Unlike past modems, this new one is full-featured and ultimately configurable. However, before I started playing I first simply plugged the old system into the new modem for a test. Just to summarize, old system was ADSL modem -> Linksys RVS4000 firewall -> house network. The initial test system was New modem -> Linksys RVS4000 -> house network. So all should be good, correct?

Before they came I did a Telus speed test. It showed 22.5 down, 1 up, which is pretty good for the 25 plan. The new plan (75) should be 75down, 10up. Once they were done, I ran another Telus speed test: 10up, but 4 down!!! What could be wrong?

On a hunch, based on a bad streaming experience some years ago as well as issues with the RVS4000 a decade ago in a co-locate, I pulled the RVS4000 and re-ran the test: 75down, 10up!

So here’s a warning to anyone using 10-year old technology with faster internet: DON’T. The old crap just can’t keep up. The RVS4000 may have been an expensive device 10 years ago, but it’s brain was an atom processor, which is about 1/100 of a modern smart phone (just guessing!).

At any rate, the little atom processor simply cannot keep up with modern high speed internet. This also confirms the RVS4000 was the problem with streaming some years ago, though I could not pull it at the time to test.

However, the new modem  is awesome. It has wifi that is incredible. My old wifi was a good 10 year old device with big antennae, but devices only ever got 2 bars max anywhere in the upstairs. Now you get 5 bars everywhere, and coupled with the high speed, downloads are amazingly fast.

So all-in-all a great upgrade for $8 more per month.
Glassblowing update for Nov

With the furnace cold, I removed the broken lid and had a look.

The metal is actually thick sheet metal, and in good shape, so no change needed. The brick lid was broken into four pieces, so was discarded.

The new lid was about 1/2 in too long as was the last lid, so I cut the new lid down to size, and now it fits perfectly without distorting the sheet metal. I cemented the cut face with two coats and cured it in the annealer at 100F. I then installed it in the metal frame. As it turns out, painting the fame clogged the fastening clamps, making it very difficult to properly secure the brick in the frame. In the end a set of pliers and a ratchet got the job done.

The furnace is clean, crucible vacuumed out and all is ready to go hot.

More 3D Printed goodies

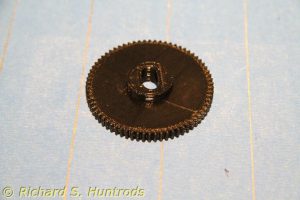
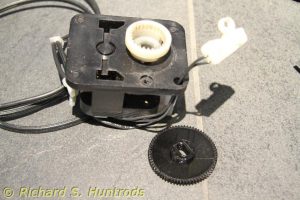
A week ago the ancient electric pencil sharpener died. The motor could be heard spinning when  a pencil was inserted, but no sharpening action. I took it apart to find the large gear that drives the sharpening mechanism was broken in two pieces. As I shook it out, it broke again. Time for a new unit? Not with a 3D Printer! Before I gave up on this item, I would try and print a replacement gear.

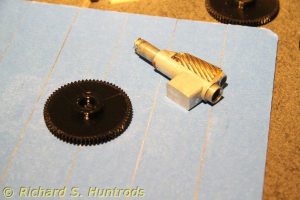
Designing gears is not fun, but the on-line CAD program Tinkercad had a community supplied gear builder. I took measurements from the broken gear, counted the teeth (70) and designed a new one. My first print wasn’t correct. The broken gear did not reveal the drive slot was only partially into the gear, with a round shaft for the rest. Once I had one new gear with the slot all through it was easy to see what needed to be done. The next gear fit well and worked. It’s noisy, but it works.


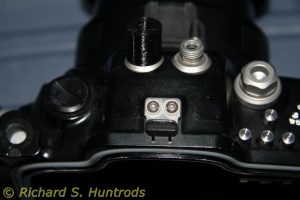
The next challenge was designing an optical connector for my underwater camera housing. The very expensive part from the manufacturer (double any equivalent price) screws onto an optical fitting on the housing. The bare cable has an optical end, but must be mechanically connected to the strobe and housing. On the strobe it’s a simple hole, but I needed something similar on the housing. Again using Tinkercad, I was able to design a simple connector. It took a few tries to get the sizes correct as things must be tight but still fit. After 5 tries I had a good fit. Now to take it to the water for a test dive.  The optical port is shown mounted on the housing on the upper center left.